

Meta Description
How to fix Windows 11 black screen with 12 proven solutions. Learn how to fix black screen after login, startup, update, or with cursor using this easy step-by-step guide.
How to Fix Windows 11 Black Screen
Introduction
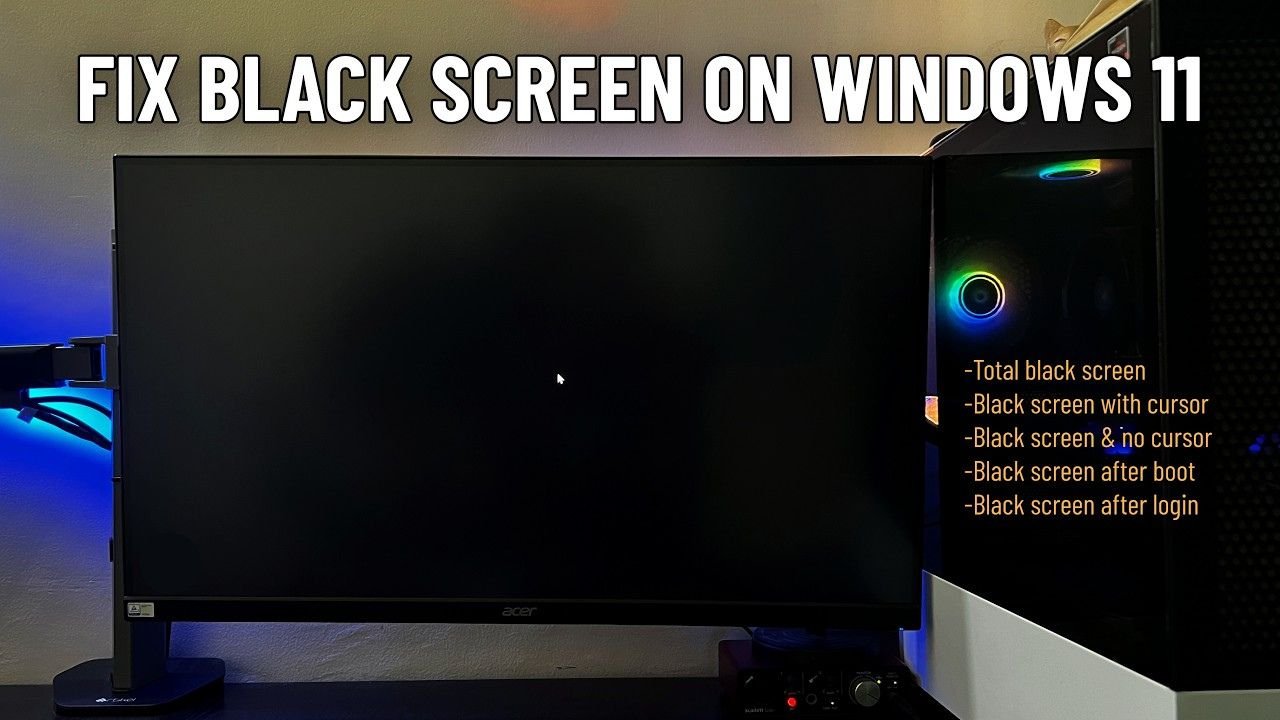
If you’re searching for how to fix Windows 11 black screen, you’re not alone. A black screen is one of the most frustrating problems Windows users experience. It can appear during startup, after logging in, after a Windows Update, or even while using your computer. Sometimes the cursor is visible, while in other cases the display remains completely blank. Although the issue can be alarming, it does not always mean your computer is permanently damaged.
Learning how to fix Windows 11 black screen starts with understanding what causes the problem. Hardware faults, corrupted system files, outdated graphics drivers, failed updates, or incorrect display settings can all lead to a Windows 11 black screen. The good news is that most of these issues can be resolved without reinstalling Windows or losing your personal files.
This comprehensive guide explains how to fix Windows 11 black screen using practical, step-by-step methods recommended by professionals. Whether you are facing a Windows 11 black screen after login, a Windows 11 black screen after update, a Windows 11 black screen with cursor, or your Windows 11 won’t boot at all, you’ll find reliable solutions throughout this guide. By following each section carefully, you can troubleshoot your PC, restore normal operation, and reduce the chances of facing the same issue again.
If you’re not sure how to start your PC in Safe Mode, read our Windows 11 Safe Mode Guide for detailed step-by-step instructions before trying the fixes below.
What Causes a Windows 11 Black Screen?
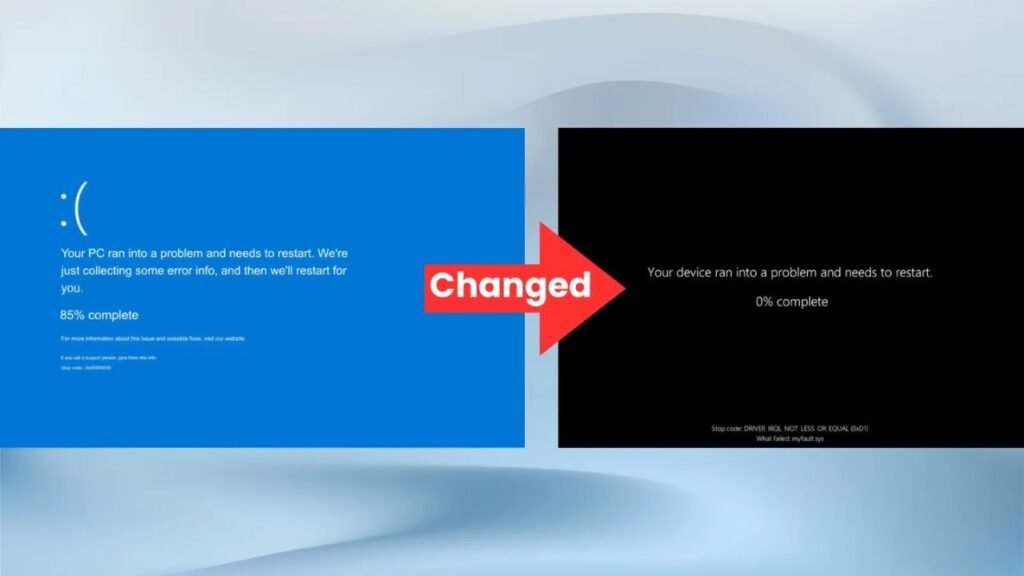
A Windows 11 black screen can occur for several different reasons. Before attempting repairs, it is important to identify what may have triggered the problem. Some causes are related to hardware components, while others originate from software errors or system conflicts. Understanding the source of the problem helps you choose the correct troubleshooting method and prevents unnecessary changes to your computer.
In many situations, a black screen appears after installing a Windows Update, updating a graphics driver, connecting a new monitor, or changing display settings. Corrupted system files, driver conflicts, damaged Windows installations, or faulty hardware can also interrupt the boot process. Fortunately, most of these problems can be diagnosed and repaired using built-in Windows 11 troubleshooting tools.
Hardware Problems
Hardware-related issues are among the most common reasons behind a Windows 11 display issue. If the monitor connection is loose, the HDMI cable is damaged, or the graphics card is not seated properly, your computer screen may remain black even though the system is running normally. External monitors, docking stations, or recently installed hardware can also interfere with the display during startup.
Power supply instability, failing RAM modules, overheating GPUs, or hardware diagnostics revealing motherboard faults may also result in a Windows 11 black screen on startup. If your laptop black screen appears immediately after powering on, checking the display cable, external monitor, graphics card, and monitor connection should be your first troubleshooting step. Eliminating hardware faults before making software changes saves time and prevents unnecessary repairs.
Software Problems
Software issues are another major reason users search for how to fix Windows 11 black screen. Corrupted system files, failed Windows Update installations, incompatible applications, damaged display drivers, or incorrect display settings can all interrupt the boot process. A recent graphics driver update may introduce compatibility issues, while outdated GPU drivers can prevent Windows from displaying the desktop correctly.
Driver conflicts, corrupted registry entries, interrupted updates, or damaged boot files often cause the screen goes black after login or leave users with a Windows 11 black screen with cursor. Fortunately, Windows provides several recovery options, including Safe Mode, Startup Repair, System File Checker (SFC), Deployment Image Servicing and Management (DISM), Device Manager, and Windows Recovery Environment. These tools make it possible to repair Windows installation problems without deleting personal files.
Understanding whether your problem is caused by hardware or software is the foundation of successful Windows 11 troubleshooting. Once the cause becomes clearer, you can move on to the next solutions, beginning with basic restart procedures before progressing to more advanced repair methods.
Restart Your Computer Properly
A simple restart may seem like an obvious solution, but it is surprisingly effective when learning how to fix Windows 11 black screen. Temporary system glitches, incomplete updates, background software conflicts, and memory errors can all prevent Windows 11 from loading the desktop correctly. Restarting the computer clears temporary processes, reloads essential Windows services, and gives the operating system a fresh start.
Many users experience a Windows 11 black screen after login, a Windows 11 black screen after update, or a Windows 11 black screen on startup because Windows failed to complete a previous shutdown correctly. Performing a proper restart allows the system to reload the display driver, reconnect with the monitor, and rebuild temporary system resources. Before trying advanced troubleshooting methods, always begin with a complete restart.
Perform a Hard Restart
A hard restart is one of the safest and fastest troubleshooting methods when your computer screen is black but the device still appears to be running. If the display is frozen and you cannot access the desktop, press and hold the power button for approximately 10 seconds until the computer shuts down completely. Wait another 20–30 seconds before pressing the power button again to start the PC.
For laptop users, disconnect the charger after shutting down the device. If the battery is removable, remove it for about one minute before reconnecting it. Desktop users should also ensure that the monitor remains powered on and that the HDMI cable, DisplayPort cable, or other display connection is firmly attached. A loose monitor connection can often appear as a Windows 11 display issue even when the computer itself is functioning normally.
After restarting, pay close attention to the boot process. If the manufacturer’s logo appears but the screen becomes black afterward, the issue is likely software-related. If nothing appears at all, hardware components such as the graphics card, monitor, RAM, or power supply may require further inspection.
If Windows successfully loads after the restart, allow a few minutes for background services to finish loading. Sometimes a delayed desktop is mistaken for a permanent black screen. Avoid repeatedly forcing shutdowns unless necessary, as doing so may interrupt important Windows processes or updates.
If the black screen returns immediately after restarting, continue with the next troubleshooting method. The following section explains how restarting the graphics driver can quickly restore the display without rebooting the entire computer.
Why a Hard Restart Helps
A proper hard restart clears temporary memory errors, stops frozen background applications, reloads Windows system services, and resets the display driver. It also helps recover from temporary driver conflicts, incomplete Windows Update installations, and minor startup issues that prevent Windows from displaying the desktop.
In many cases, users searching for how to fix Windows 11 black screen after login, how to fix Windows 11 black screen after update, or Windows 11 black screen with cursor discover that a clean restart restores normal operation without additional repairs. While it is not a permanent solution for every situation, it is the safest first step before using more advanced recovery tools such as Safe Mode, Windows Recovery Environment, Startup Repair, System File Checker (SFC), or DISM.
By starting with this simple troubleshooting step, you eliminate many temporary software problems and make it easier to identify whether the remaining issue is related to hardware, graphics drivers, corrupted system files, or Windows itself.
Restart the Graphics Driver
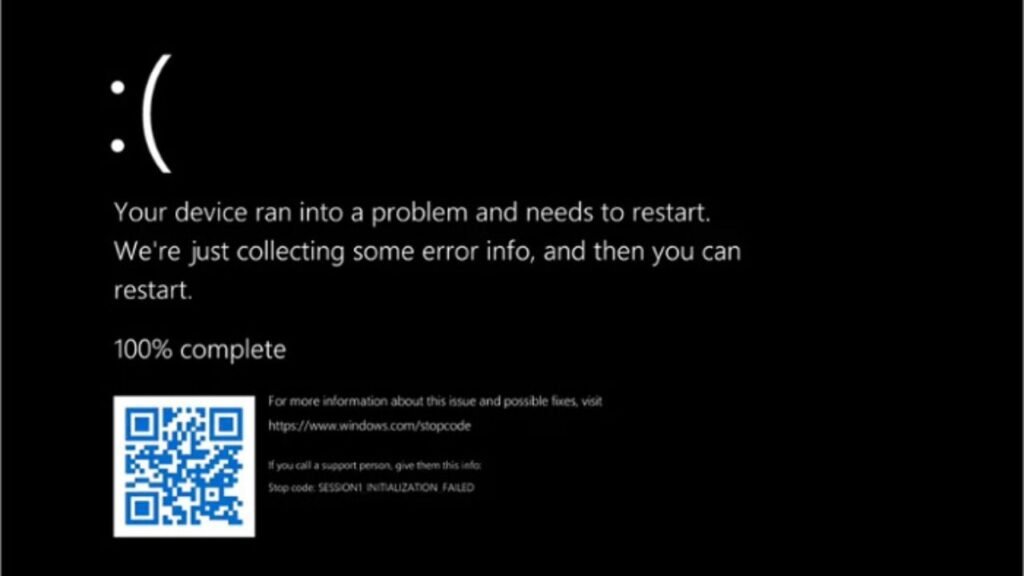
A corrupted or unresponsive graphics driver is one of the most common reasons behind a Windows 11 black screen. If your computer is powered on but the display remains black, the problem may not be Windows itself—it could simply be that the graphics driver has stopped responding. This is especially common after a Windows Update, installing a new GPU driver, or waking the computer from sleep.
Before trying advanced recovery options, attempt to restart the graphics driver. This quick troubleshooting step can restore your display in just a few seconds without restarting your PC. It is particularly effective if you are experiencing a Windows 11 black screen with cursor, a Windows 11 black screen after login, or a temporary display issue caused by a driver conflict.
Use the Win + Ctrl + Shift + B Shortcut
Windows 11 includes a built-in keyboard shortcut that instantly restarts the graphics driver. Press the following keys together:
Windows + Ctrl + Shift + B
When the shortcut is activated correctly, the screen may briefly flicker, and you might hear a short beep. This indicates that Windows has restarted the graphics driver. If the problem was caused by a temporary graphics issue, your desktop should reappear within a few seconds.
This shortcut works because it resets the communication between Windows, the graphics card, and your monitor without forcing a complete reboot. Unlike restarting the entire computer, this method only refreshes the display subsystem, making it one of the fastest solutions for resolving temporary display failures.
When This Shortcut Works Best
The keyboard shortcut is most effective when Windows is still running in the background but the display has stopped responding. For example, if you can hear notification sounds, system alerts, or the startup sound, your operating system is likely working normally while the graphics driver has frozen.
This method is particularly useful for resolving:
- Windows 11 black screen after login
- Windows 11 black screen after sleep
- Windows 11 black screen after installing graphics driver
- Windows 11 black screen with cursor
- Temporary Windows 11 display issue
- Screen goes black after login
- Driver conflict after Windows Update
It is less effective if your computer fails to start entirely or displays no manufacturer logo during boot. In those cases, the problem may involve hardware, damaged boot files, or serious system corruption.
What to Do If the Shortcut Doesn’t Work
If pressing Windows + Ctrl + Shift + B does not restore the display, wait at least one minute before assuming it has failed. Some computers take longer to reload the graphics driver, especially older systems with integrated graphics.
If the screen remains black, disconnect any unnecessary external monitors, docking stations, or adapters. Multiple display configurations can occasionally prevent Windows from selecting the correct monitor during startup. Verify that your monitor is powered on and that the HDMI cable, DisplayPort cable, or other video connection is firmly connected.
Should the issue persist, proceed to the next troubleshooting steps. Booting into Safe Mode, updating or rolling back the display driver, and using Device Manager to reinstall the graphics adapter driver are often effective solutions for persistent display problems.
Why Graphics Drivers Cause Black Screen Issues
Graphics drivers act as the bridge between Windows 11, your GPU, and your monitor. If the driver becomes corrupted, outdated, or incompatible, Windows may continue running while failing to display the desktop. This often occurs after installing a new graphics driver, updating Windows, or using software that modifies display settings.
Driver-related problems can also lead to symptoms such as:
- Computer screen is black
- No display on Windows
- Laptop black screen
- Desktop display problem
- Boot error
- Startup issue
- Monitor not detecting signal
Keeping your graphics drivers up to date through trusted sources and avoiding interrupted driver installations significantly reduces the risk of future black screen errors. If restarting the graphics driver does not solve the issue, the next step is to inspect connected hardware and eliminate conflicts caused by external devices.
Disconnect External Devices
External devices are often overlooked when troubleshooting a Windows 11 black screen, yet they can easily interfere with the boot process or prevent Windows from displaying the desktop correctly. USB devices, external hard drives, printers, webcams, docking stations, additional monitors, and even wireless adapters can create hardware conflicts during startup. If Windows detects a problem while initializing one of these devices, it may display nothing more than a black screen.
Many users begin searching for how to fix Windows 11 black screen after connecting a new monitor, installing a docking station, or attaching an external storage device. In some cases, Windows attempts to send the display output to the wrong monitor, while in others, a faulty peripheral interrupts the normal boot process. Before moving to advanced troubleshooting methods, disconnecting all unnecessary hardware is a simple yet highly effective step.
Test with Only Essential Hardware
Start by turning off your computer completely. If your PC is frozen on a black screen, press and hold the power button for about 10 seconds until it shuts down. Once powered off, disconnect every non-essential device connected to your computer.
Remove devices such as:
- External hard drives and SSDs
- USB flash drives
- Printers and scanners
- Webcams
- Gaming controllers
- USB hubs
- Docking stations
- External speakers
- SD cards
- Secondary monitors
- Bluetooth adapters
- Any recently connected accessories
Leave connected only the components required to start the computer. For a desktop PC, this means the monitor, keyboard, mouse, and power cable. Laptop users should disconnect all USB devices and remove any memory cards while keeping only the power adapter connected if necessary.
After disconnecting everything, power on the computer again. If Windows starts normally, one of the disconnected devices was likely causing the conflict. Reconnect each device one at a time, restarting the computer after each connection. This method helps identify the exact peripheral responsible for the Windows 11 display issue.
Check Your Monitor Connection
A faulty monitor connection is another common cause of a Windows 11 black screen on startup. Even if the computer is running correctly, the display may remain blank because the monitor is not receiving a video signal.
Inspect the following carefully:
- Ensure the monitor is turned on.
- Verify the power cable is securely connected.
- Check the HDMI, DisplayPort, VGA, or USB-C cable for damage.
- Try a different display cable if available.
- Connect the monitor to another computer to verify it is working.
- If your desktop has both integrated graphics and a dedicated graphics card, confirm the monitor is connected to the correct video output.
Sometimes, simply replacing a damaged HDMI cable resolves what appears to be a serious Windows problem.
Disconnect Additional Displays
If you use multiple monitors, Windows may mistakenly detect the wrong display as the primary screen. This can create the impression that the computer has frozen, when in reality the desktop is appearing on another monitor.
Disconnect every external monitor except one and restart the computer. Once Windows loads successfully, reconnect additional displays one at a time and verify the display settings. This is particularly helpful for users experiencing a Windows 11 black screen after login, a Windows 11 black screen after update, or a Windows 11 black screen with cursor after changing monitor configurations.
Inspect Recently Installed Hardware
If the black screen started immediately after installing new hardware, that component may be incompatible or improperly connected.
Examples include:
- New graphics card
- Additional RAM
- SSD or HDD
- PCIe expansion card
- External GPU
- Docking station
Remove the newly installed hardware temporarily and attempt to boot the computer again. If Windows starts normally, reinstall the hardware carefully or check for updated drivers and firmware before reconnecting it.
Why This Step Is Important
Testing your computer with only essential hardware eliminates many possible causes of a Windows 11 black screen. Faulty peripherals, damaged cables, incompatible accessories, and incorrect monitor configurations frequently cause startup issues that resemble serious operating system failures.
This troubleshooting step also helps determine whether the problem is related to hardware or software. If disconnecting external devices restores the display, you can avoid unnecessary repairs involving Safe Mode, Startup Repair, System File Checker (SFC), DISM, or reinstalling Windows.
Once you have confirmed that external hardware is not causing the problem, the next step is to boot into Windows Recovery Environment and start Windows in Safe Mode, where you can diagnose driver conflicts, remove problematic software, and repair corrupted system files more effectively.
Boot Windows 11 into Safe Mode
If the previous troubleshooting methods did not solve the problem, the next step in learning how to fix Windows 11 black screen is to start your computer in Safe Mode. Safe Mode is a built-in Windows diagnostic environment that loads only the essential drivers and services required to run the operating system. For a complete walkthrough with screenshots, read our Windows 11 Safe Mode Guide before continuing with the steps below.By preventing unnecessary applications and third-party drivers from loading, Safe Mode makes it much easier to identify the cause of a Windows 11 black screen.
Many users successfully resolve a Windows 11 black screen after login, Windows 11 black screen after update, or Windows 11 black screen with cursor simply by entering Safe Mode and removing the software or driver causing the issue. If Windows starts normally in Safe Mode but not in normal mode, you can be confident that the problem is software-related rather than a hardware failure.
Access Windows Recovery Environment
If your computer cannot reach the Windows desktop, you can use Windows Recovery Environment (WinRE) to access troubleshooting tools. WinRE is designed to help repair startup issues, restore Windows, and provide recovery options when the operating system fails to load properly.
To enter Windows Recovery Environment, follow these steps:
- Turn on your computer.
- As soon as the Windows logo appears, press and hold the power button to force the PC to shut down.
- Repeat this process three times.
- On the fourth startup, Windows should automatically launch Windows Recovery Environment.
- Select Troubleshoot.
- Choose Advanced Options.
- Click Startup Settings.
- Select Restart.
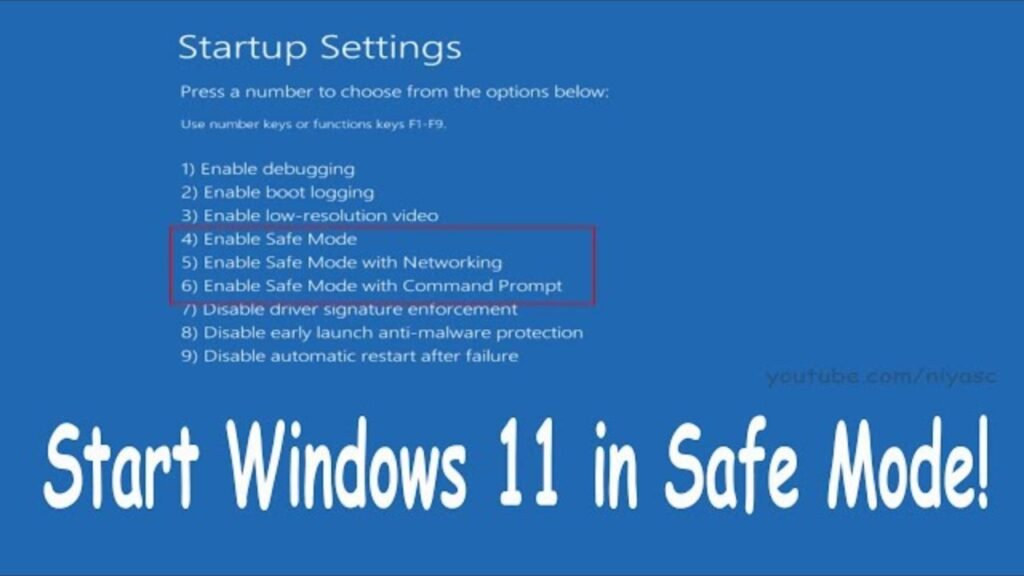
After restarting, Windows will display several startup options that allow you to boot into Safe Mode.
If WinRE does not appear automatically, you can also access it using a Windows 11 installation USB drive by selecting Repair your computer instead of installing Windows.
Why Windows Recovery Environment Is Important
The Windows Recovery Environment contains several powerful tools for diagnosing startup problems. Besides Safe Mode, it includes Startup Repair, System Restore, Command Prompt, Uninstall Updates, and other recovery options that can repair boot errors without deleting personal files.
If your Windows 11 won’t boot, WinRE provides a safe environment where you can troubleshoot corrupted system files, driver conflicts, damaged boot records, and Windows Update failures. Many advanced repairs begin from this recovery platform.
Enable Safe Mode
After your computer restarts into the Startup Settings menu, you’ll see several numbered options.
Choose one of the following:
- Press 4 or F4 to start Safe Mode.
- Press 5 or F5 to start Safe Mode with Networking.
- Press 6 or F6 to start Safe Mode with Command Prompt.
For most troubleshooting tasks, Safe Mode with Networking is the best choice because it allows you to download updated drivers and Windows updates if an internet connection is available.
If you need more detailed instructions for entering Safe Mode, check out our complete Windows 11 Safe Mode Guide for additional methods and troubleshooting tips.
When Windows finishes loading, the desktop will appear with a basic display and minimal drivers. This simplified environment disables many background services that may be responsible for the black screen.
What to Do in Safe Mode
Once inside Safe Mode, begin checking for possible causes of the problem.
Recommended actions include:
- Open Device Manager and inspect the display adapter.
- Uninstall recently installed graphics drivers if the issue began after an update.
- Remove software installed shortly before the black screen appeared.
- Scan for corrupted system files using System File Checker (SFC).
- Run Deployment Image Servicing and Management (DISM) to repair the Windows image.
- Check for pending Windows Update installations.
- Disable unnecessary startup applications.
- Restart the computer normally after making changes.
If Windows boots normally after leaving Safe Mode, you have likely removed the software or driver responsible for the issue.
Signs That Safe Mode Identified the Problem
Safe Mode helps determine whether the Windows 11 display issue is caused by software or hardware.
If the computer works correctly in Safe Mode, the problem is usually related to:
- Graphics driver corruption
- Driver conflict
- Startup application errors
- Failed Windows Update
- Corrupted system files
- Third-party antivirus software
- Recently installed programs
If the black screen still appears even in Safe Mode, the issue may involve faulty hardware, damaged storage devices, memory problems, BIOS or UEFI settings, or graphics hardware failure. In these situations, additional hardware diagnostics may be necessary.
Why Safe Mode Is One of the Best Troubleshooting Tools
Safe Mode remains one of the most reliable methods for resolving persistent Windows startup issues. It provides a controlled environment where unnecessary drivers and services are disabled, allowing you to repair Windows safely without risking additional system damage.
Whether you are trying to fix a Windows 11 black screen on startup, Windows 11 black screen after boot, Windows 11 black screen after sleep, or Windows 11 black screen no cursor, Safe Mode offers an excellent starting point for identifying the root cause. Once you have confirmed that Windows can operate normally in Safe Mode, the next step is to update or roll back your display drivers to eliminate graphics-related problems completely.
Update or Roll Back Display Drivers
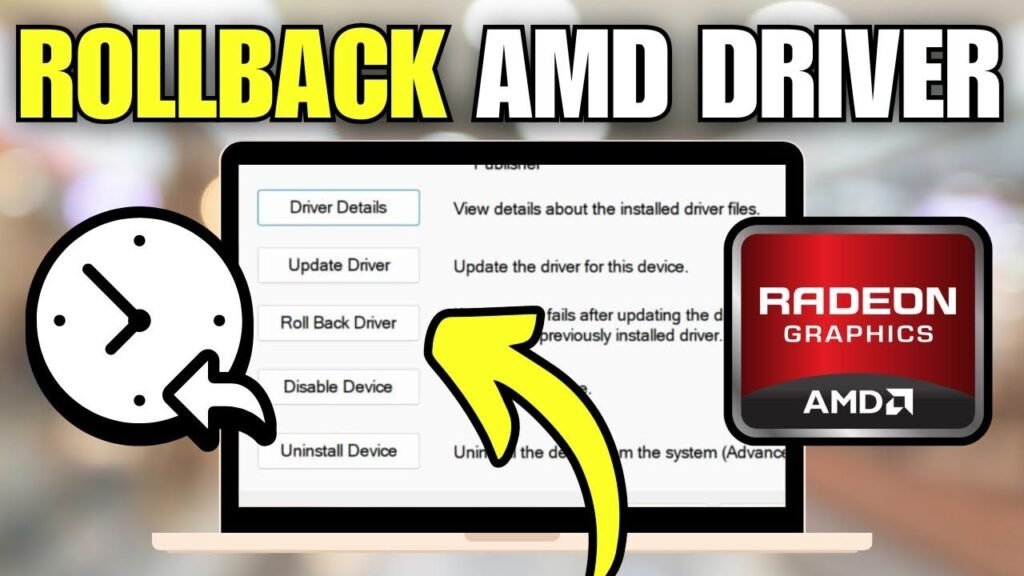
Graphics drivers are responsible for enabling communication between Windows 11, your graphics card, and your monitor. If these drivers become outdated, corrupted, or incompatible, your system may display a Windows 11 black screen during startup, after login, or following a Windows update. This is one of the most common reasons users search for how to fix Windows 11 black screen.
Driver problems often occur after installing a new GPU driver, upgrading Windows, or using beta drivers from graphics card manufacturers. Fortunately, Windows provides built-in tools that allow you to update, reinstall, or roll back display drivers without reinstalling the operating system.
Update Graphics Driver
Updating the graphics driver should be your first step if the black screen began after a Windows update or if your current driver is outdated.
To update your graphics driver:
- Boot into Safe Mode if necessary.
- Press Windows + X and select Device Manager.
- Expand the Display adapters section.
- Right-click your graphics card.
- Select Update driver.
- Choose Search automatically for drivers.
- Follow the on-screen instructions.
- Restart your computer after the installation finishes.
If Windows cannot find a newer driver, you can manually install the latest stable driver provided for your graphics hardware. Avoid installing unofficial or experimental drivers, as they may introduce additional compatibility issues.
Why Updating the Graphics Driver Helps
Every graphics driver contains software that controls how Windows communicates with your GPU. When the driver becomes damaged or incompatible, Windows may continue running while failing to display the desktop correctly.
Updating the driver can resolve:
- Windows 11 black screen after login
- Windows 11 black screen after update
- Windows 11 black screen with cursor
- Windows 11 display issue
- Screen goes black after login
- No display on Windows
- Graphics card compatibility problems
- Driver conflict after Windows Update
Keeping graphics drivers updated also improves system stability, gaming performance, hardware compatibility, and support for newer Windows features.
Roll Back Recent Driver
If the black screen appeared immediately after updating your graphics driver, installing an older driver may solve the problem. New drivers occasionally contain bugs that affect certain hardware configurations.
To roll back a graphics driver:
- Open Device Manager.
- Expand Display adapters.
- Right-click your graphics card.
- Select Properties.
- Open the Driver tab.
- Click Roll Back Driver.
- Choose the reason for rolling back.
- Restart your computer.
If the Roll Back Driver button is unavailable, uninstall the current graphics driver and reinstall a previously stable version compatible with your hardware.
Reinstall the Display Driver
If updating or rolling back the driver does not work, reinstalling it completely may remove corrupted driver files.
Steps include:
- Open Device Manager.
- Right-click the graphics adapter.
- Select Uninstall device.
- Check Delete the driver software for this device if available.
- Restart the computer.
- Windows will automatically install a basic display driver during startup.
Once Windows loads normally, install the latest stable graphics driver recommended for your graphics hardware.
A clean driver installation removes damaged driver files, corrupted settings, and registry conflicts that may cause startup failures.
Check for Windows Update Driver Fixes
Sometimes Microsoft releases updated display drivers through Windows Update. If your black screen began after installing an older driver, Windows Update may already contain a newer, more stable version.
To check:
- Open Settings.
- Select Windows Update.
- Click Check for updates.
- Install all available updates.
- Review Optional Updates for graphics drivers.
- Restart the computer.
Installing both system updates and optional driver updates helps resolve compatibility issues between Windows and modern graphics hardware.
Prevent Future Driver Problems
Display driver issues are one of the leading causes of recurring black screen errors. Following a few best practices can greatly reduce the chances of seeing the problem again.
Recommended practices include:
- Install only stable graphics drivers.
- Create a restore point before updating drivers.
- Avoid interrupting driver installations.
- Keep Windows fully updated.
- Remove outdated GPU software before installing new drivers.
- Restart the PC after every driver update.
- Avoid unofficial driver download sources.
These habits improve long-term system reliability and reduce the risk of display failures after major Windows upgrades.
Why Driver Maintenance Matters
A healthy graphics driver is essential for proper communication between Windows, your monitor, and your graphics hardware. Outdated or corrupted drivers often produce symptoms such as:
- Windows 11 black screen on startup
- Windows 11 black screen after boot
- Windows 11 black screen after sleep
- Windows 11 black screen no cursor
- Desktop display problem
- Monitor not detecting signal
- Startup issue
- Boot error
By keeping your graphics drivers updated—or rolling back unstable versions when necessary—you can eliminate one of the most common causes of display failures. If the problem still persists after repairing the display driver, the next step is to repair corrupted Windows system files using System File Checker (SFC) and Deployment Image Servicing and Management (DISM).
Repair Corrupted Windows Files
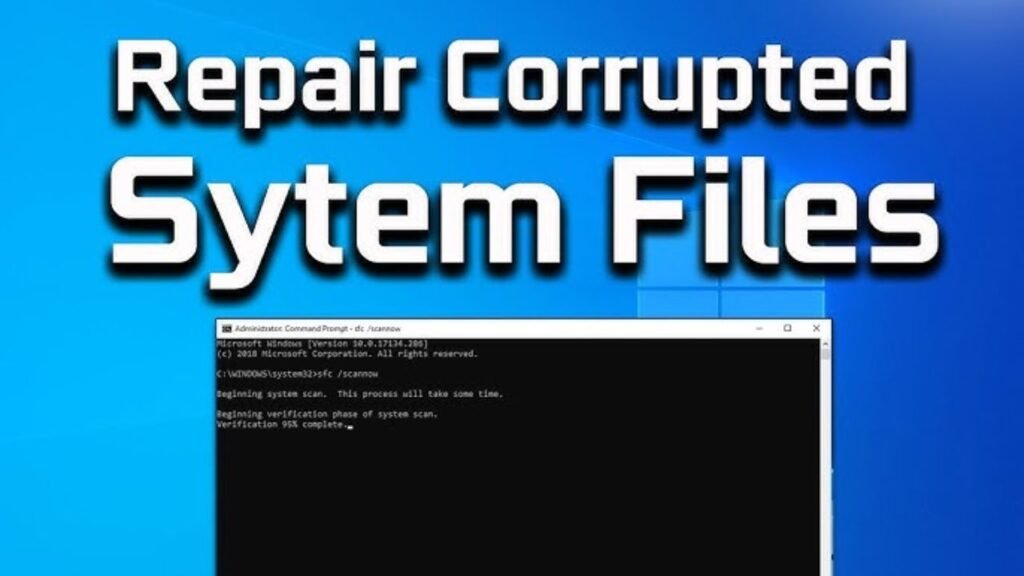
Corrupted or missing system files are another major reason users search for how to fix Windows 11 black screen. Every time Windows starts, hundreds of essential system files load during the boot process. If even one critical file becomes damaged because of a failed update, sudden power loss, malware, or disk errors, Windows may display nothing but a black screen.
Fortunately, Windows 11 includes powerful built-in repair tools that can automatically detect and restore damaged files. The two most effective utilities are System File Checker (SFC) and Deployment Image Servicing and Management (DISM). These tools work together to repair corrupted Windows components without deleting your personal files.
Run SFC Scan
System File Checker (SFC) scans protected Windows system files and replaces damaged or missing versions with healthy copies stored in the Windows cache. This is often one of the first repair methods recommended when dealing with a Windows 11 black screen, unexpected crashes, or startup errors.
To run an SFC scan:
- Boot into Safe Mode or Windows Recovery Environment if Windows will not start normally.
- Open Command Prompt with administrator privileges.
- Type the following command:
sfc /scannow
- Press Enter.
- Wait for the scan to complete. This may take several minutes.
- Restart your computer after the process finishes.
If SFC reports that it repaired corrupted files, restart the system and check whether the black screen issue has been resolved.
What SFC Repairs
The System File Checker utility repairs many common Windows problems, including:
- Corrupted system files
- Missing Windows components
- Damaged startup files
- Windows boot errors
- Display-related system file corruption
- Unexpected system crashes
- Operating system instability
If the scan reports that it found errors but could not repair them, do not worry. The next tool, DISM, is designed to repair the Windows image itself before running SFC again.
If the issue persists, you can also refer to Microsoft’s official troubleshooting documentation for additional recovery steps.
Run DISM Commands
Deployment Image Servicing and Management (DISM) repairs the Windows operating system image that SFC relies on. If the Windows image is damaged, SFC may not be able to replace corrupted files successfully. Running DISM first often restores the system image and allows SFC to complete repairs.
Open Command Prompt as Administrator and run the following commands one at a time:
DISM /Online /Cleanup-Image /CheckHealth
Press Enter and wait for the command to finish.
Next, run:
DISM /Online /Cleanup-Image /ScanHealth
After that completes, run:
DISM /Online /Cleanup-Image /RestoreHealth
Allow the repair process to finish completely. Depending on your computer and the level of corruption, this may take 15 to 30 minutes.
When DISM has completed successfully, restart your computer and run the SFC /Scannow command again. Using both tools together provides the best chance of repairing damaged Windows files.
Why DISM Is Important
DISM repairs the core Windows image that supports the operating system. If the Windows image is corrupted, startup problems, update failures, and display issues can continue even after reinstalling drivers.
Running DISM is particularly useful for resolving:
- Windows 11 black screen after update
- Windows 11 won’t boot
- Startup issue
- Boot error
- Corrupted system files
- Windows Recovery Environment repair failures
- Windows installation corruption
Using DISM before attempting more advanced recovery methods can save hours of troubleshooting and may eliminate the need to reset Windows completely.
Perform Startup Repair
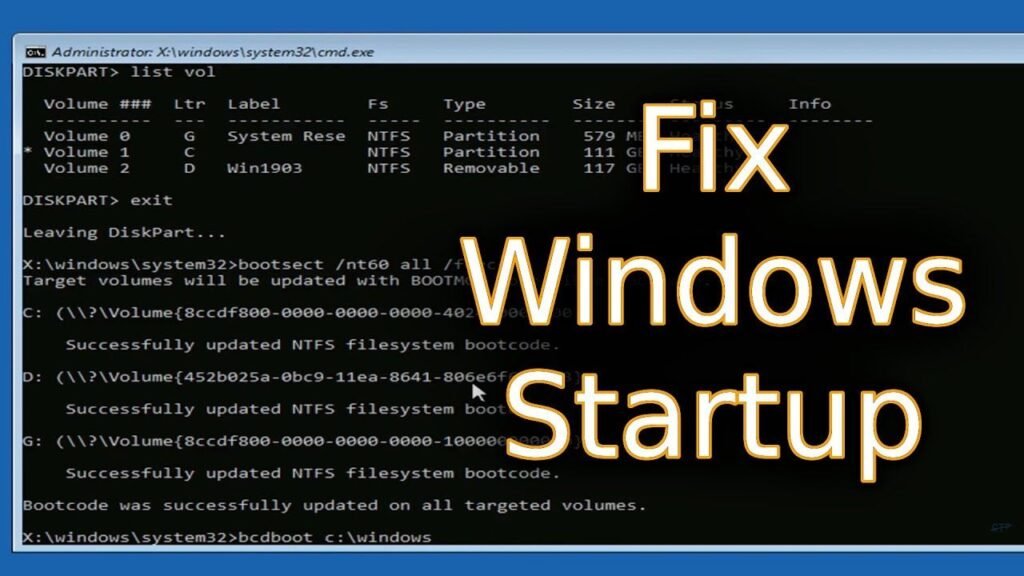
If repairing Windows files does not resolve the issue, the next step in learning how to fix Windows 11 black screen is to use Startup Repair. This built-in recovery feature automatically scans Windows for problems that prevent the operating system from starting correctly.
Startup Repair is especially useful when your computer repeatedly enters a boot loop, displays a permanent black screen, or fails to load the Windows login screen after an update or unexpected shutdown.
Use Automatic Repair
To launch Startup Repair:
- Enter Windows Recovery Environment.
- Select Troubleshoot.
- Choose Advanced Options.
- Click Startup Repair.
- Select your Windows installation.
- Allow Windows to diagnose and repair startup problems automatically.
The repair process may take several minutes. During this time, Windows checks important startup files, boot records, system settings, and configuration data. Your computer may restart more than once while repairs are being completed.
What Startup Repair Can Fix
Startup Repair is capable of correcting many common boot-related problems, including:
- Missing startup files
- Corrupted boot configuration
- Damaged system registry entries
- Failed Windows updates
- Startup service errors
- Boot loop problems
- Windows 11 black screen on startup
- Windows 11 black screen after boot
Although Startup Repair cannot fix hardware failures, it is extremely effective when software corruption prevents Windows from loading properly.
When to Use Startup Repair
Startup Repair should be used when:
- Windows fails to reach the login screen.
- The PC repeatedly restarts during boot.
- The operating system freezes on a black screen.
- Startup files become corrupted after a Windows Update.
- Other basic troubleshooting methods have failed.
If Startup Repair reports that no problems were found, the issue may be related to hardware, display drivers, or deeper system corruption.
Why Startup Repair Is Worth Trying
Startup Repair is completely automated and safe to use. It repairs essential Windows startup components without deleting documents, applications, or personal files. For many users facing a persistent Windows 11 black screen, it successfully restores normal startup without requiring a full system reset.
If the problem still exists after repairing Windows files and running Startup Repair, the final software-based solution is to reset Windows 11 while keeping your personal files. This option refreshes the operating system without permanently deleting your documents, making it an excellent last resort before considering a clean installation.
Reset Windows 11 Without Losing Files
If none of the previous troubleshooting methods have resolved the issue, resetting Windows 11 may be the most effective solution. This option reinstalls the operating system while preserving your personal files, making it an excellent last resort before performing a complete clean installation. For users searching for how to fix Windows 11 black screen, the Keep My Files option provides a balance between repairing Windows and protecting important data.
A Windows reset replaces damaged system files, removes corrupted settings, reinstalls core Windows components, and resolves many software-related startup problems. It is especially useful when the black screen is caused by severe operating system corruption, failed Windows updates, or persistent driver conflicts that cannot be repaired through normal troubleshooting.
Keep My Files Option
Windows 11 includes a recovery feature called Keep My Files, which reinstalls Windows without deleting your personal documents, pictures, videos, and other files stored in your user account. However, installed applications, custom system settings, and third-party drivers will be removed and must be reinstalled afterward.
To reset Windows while keeping your files:
- Boot into Windows Recovery Environment.
- Select Troubleshoot.
- Click Reset this PC.
- Choose Keep My Files.
- Select either Cloud Download or Local Reinstall.
- Follow the on-screen instructions.
- Allow Windows to complete the reset process.
The reset may take anywhere from 30 minutes to several hours depending on your computer’s speed and storage device. During the process, your PC may restart multiple times. Do not interrupt the reset once it has started.
Benefits of Using Keep My Files
Choosing Keep My Files offers several advantages over a clean installation. It repairs Windows while minimizing the risk of losing valuable personal information.
Benefits include:
- Repairs corrupted Windows installation files.
- Resolves severe startup issues.
- Fixes persistent Windows 11 black screen errors.
- Removes damaged system settings.
- Eliminates problematic applications.
- Reinstalls essential Windows components.
- Preserves personal documents and media files.
Although installed programs must be added again afterward, this approach is significantly faster than performing a full clean installation and restoring backups manually.
When You Should Reset Windows
Resetting Windows should be considered if you continue experiencing:
- Windows 11 black screen after login
- Windows 11 black screen after update
- Windows 11 black screen on startup
- Windows 11 black screen with cursor
- Windows 11 won’t boot
- Boot loop
- Startup Repair failures
- Corrupted system files that cannot be repaired
- Serious driver conflicts
- Operating system instability
Before beginning the reset, back up important files whenever possible. Although Keep My Files is designed to preserve personal data, maintaining a current backup is always recommended.
Tips to Prevent Future Black Screen Problems
Once your computer is working normally again, taking preventive measures can greatly reduce the chances of experiencing another black screen. Regular maintenance, timely updates, and good hardware practices help keep Windows stable and reliable.
One of the best ways to avoid future display issues is to keep both Windows and your device drivers updated. Security patches and driver improvements often include fixes for compatibility problems that can cause startup failures or display errors. However, avoid interrupting updates while they are being installed, as incomplete updates are a common source of system corruption.
Regularly inspect your hardware connections as well. Loose HDMI cables, damaged DisplayPort cables, faulty monitors, and unstable graphics cards can all create symptoms similar to software failures. If you frequently connect external displays or docking stations, verify that Windows is detecting the correct monitor after every major update.
Best Practices for Long-Term Stability
To minimize the risk of another Windows 11 black screen, follow these recommendations:
- Keep Windows Update enabled.
- Install stable graphics drivers only.
- Create regular System Restore points.
- Back up important files frequently.
- Avoid forcing shutdowns whenever possible.
- Keep enough free disk space for Windows updates.
- Scan regularly for malware.
- Monitor hardware temperatures to prevent overheating.
- Replace damaged display cables immediately.
- Keep BIOS and firmware updated when recommended by your device manufacturer.
Maintain Healthy System Files
Running maintenance tools periodically can prevent small problems from becoming major system failures.
Every few months:
- Run System File Checker (SFC).
- Use Deployment Image Servicing and Management (DISM) if Windows reports file corruption.
- Check storage drives for file system errors.
- Review startup applications and disable unnecessary programs.
- Remove outdated drivers and unused software.
These simple maintenance tasks improve system stability and reduce the likelihood of startup errors.
Protect Your Hardware
Hardware failures are another major cause of display problems. To extend the life of your computer:
- Keep ventilation openings clean.
- Remove dust from cooling fans.
- Avoid exposing the computer to excessive heat.
- Use a surge protector or UPS to protect against power interruptions.
- Handle laptops carefully to avoid display cable damage.
- Upgrade aging storage drives before failure occurs.
Preventive maintenance is often less expensive and less time-consuming than repairing a failed system.
Final Thoughts Before the Conclusion
Understanding how to fix Windows 11 black screen is valuable because the issue can occur unexpectedly, whether after a Windows update, a graphics driver installation, or a hardware change. By following the troubleshooting methods explained throughout this guide—from performing a hard restart and restarting the graphics driver to using Safe Mode, repairing corrupted system files, running Startup Repair, and resetting Windows while keeping your files—you can solve the vast majority of black screen problems without replacing your computer.
Most importantly, practicing regular system maintenance, keeping drivers updated, and monitoring hardware health will significantly reduce the chances of facing the same issue again.
Conclusion
A Windows 11 black screen can be frustrating, but in most cases it is a fixable problem rather than a sign of permanent hardware failure. Whether the issue appears during startup, after logging in, following a Windows Update, or after installing a new graphics driver, there are several proven troubleshooting methods that can restore your system.
In this guide, you learned how to fix Windows 11 black screen by performing a hard restart, restarting the graphics driver, disconnecting external devices, booting into Safe Mode, updating or rolling back display drivers, repairing corrupted system files using System File Checker (SFC) and Deployment Image Servicing and Management (DISM), running Startup Repair, and finally resetting Windows while keeping your personal files.
The key to successful troubleshooting is working through each solution step by step instead of immediately reinstalling Windows. In many cases, the issue is caused by a simple driver conflict, a failed update, or temporary software corruption that can be repaired without losing important data.
To reduce the risk of future problems, keep Windows updated, install stable graphics drivers, create regular backups, monitor your hardware, and perform routine system maintenance. Following these best practices will improve your PC’s reliability and help prevent future display issues.
If you carefully apply the methods covered in this guide, you will be well equipped to diagnose and resolve most Windows 11 black screen problems quickly and safely.
Frequently Asked Questions (FAQs)
1. Why is my Windows 11 screen black but the computer is on?
This usually means Windows is running but the display is not working correctly. Common causes include a corrupted graphics driver, incorrect display settings, a faulty monitor connection, or a temporary software conflict. Restarting the graphics driver or checking the display cable often resolves the issue.
2. How do I fix a black screen after logging into Windows 11?
If you see a black screen after entering your password, restart the graphics driver using Win + Ctrl + Shift + B, boot into Safe Mode, update or roll back the display driver, and check for recently installed software or Windows updates that may be causing the problem.
3. How do I boot Windows 11 into Safe Mode?
Force Windows to enter Windows Recovery Environment by interrupting startup three times. Then go to:
Troubleshoot → Advanced Options → Startup Settings → Restart
After restarting, press F4 for Safe Mode or F5 for Safe Mode with Networking.
4. Why is my Windows 11 screen black with a cursor?
A black screen with a visible mouse pointer usually indicates that Windows has loaded but Explorer.exe, the graphics driver, or another startup component failed to launch properly. Updating drivers, repairing system files, or using Startup Repair often fixes this issue.
5. Can Windows Update cause a black screen?
Yes. Occasionally, an incomplete or incompatible Windows Update can create display problems, corrupt system files, or install incompatible drivers. Booting into Safe Mode and uninstalling the recent update can often restore normal operation.
6. Does reinstalling graphics drivers fix a black screen?
Yes. Corrupted or incompatible graphics drivers are one of the most common causes of a Windows 11 black screen. Reinstalling or rolling back the display driver frequently resolves startup and display issues.
7. How do I repair Windows 11 startup problems?
Use Windows Recovery Environment and launch Startup Repair from:
Troubleshoot → Advanced Options → Startup Repair
Windows will automatically scan for damaged startup files and attempt to repair them.
8. How do I reset Windows 11 without losing files?
Open Windows Recovery Environment, select Reset this PC, then choose Keep My Files. Windows will reinstall the operating system while preserving your personal documents, photos, and other user data.
9. Can faulty RAM cause a black screen?
Yes. Defective or improperly installed RAM can interrupt the boot process and prevent Windows from displaying the desktop. Reseating the memory modules or testing them with diagnostic tools can help identify the problem.
10. Why does my laptop show a black screen after startup?
Possible causes include a corrupted graphics driver, failed Windows update, damaged system files, display cable problems, failing storage devices, or hardware faults. Begin with a hard restart, then proceed through Safe Mode, driver repairs, and Startup Repair before considering a Windows reset.
